Index:
1. How to change language and sign in to Tinkercad.
2. Adding shapes and changing its dimensions and color.
3. How to rotate a shape and move it up or down.
4. How to group several shapes and make holes.
4. How to group several shapes and make holes.
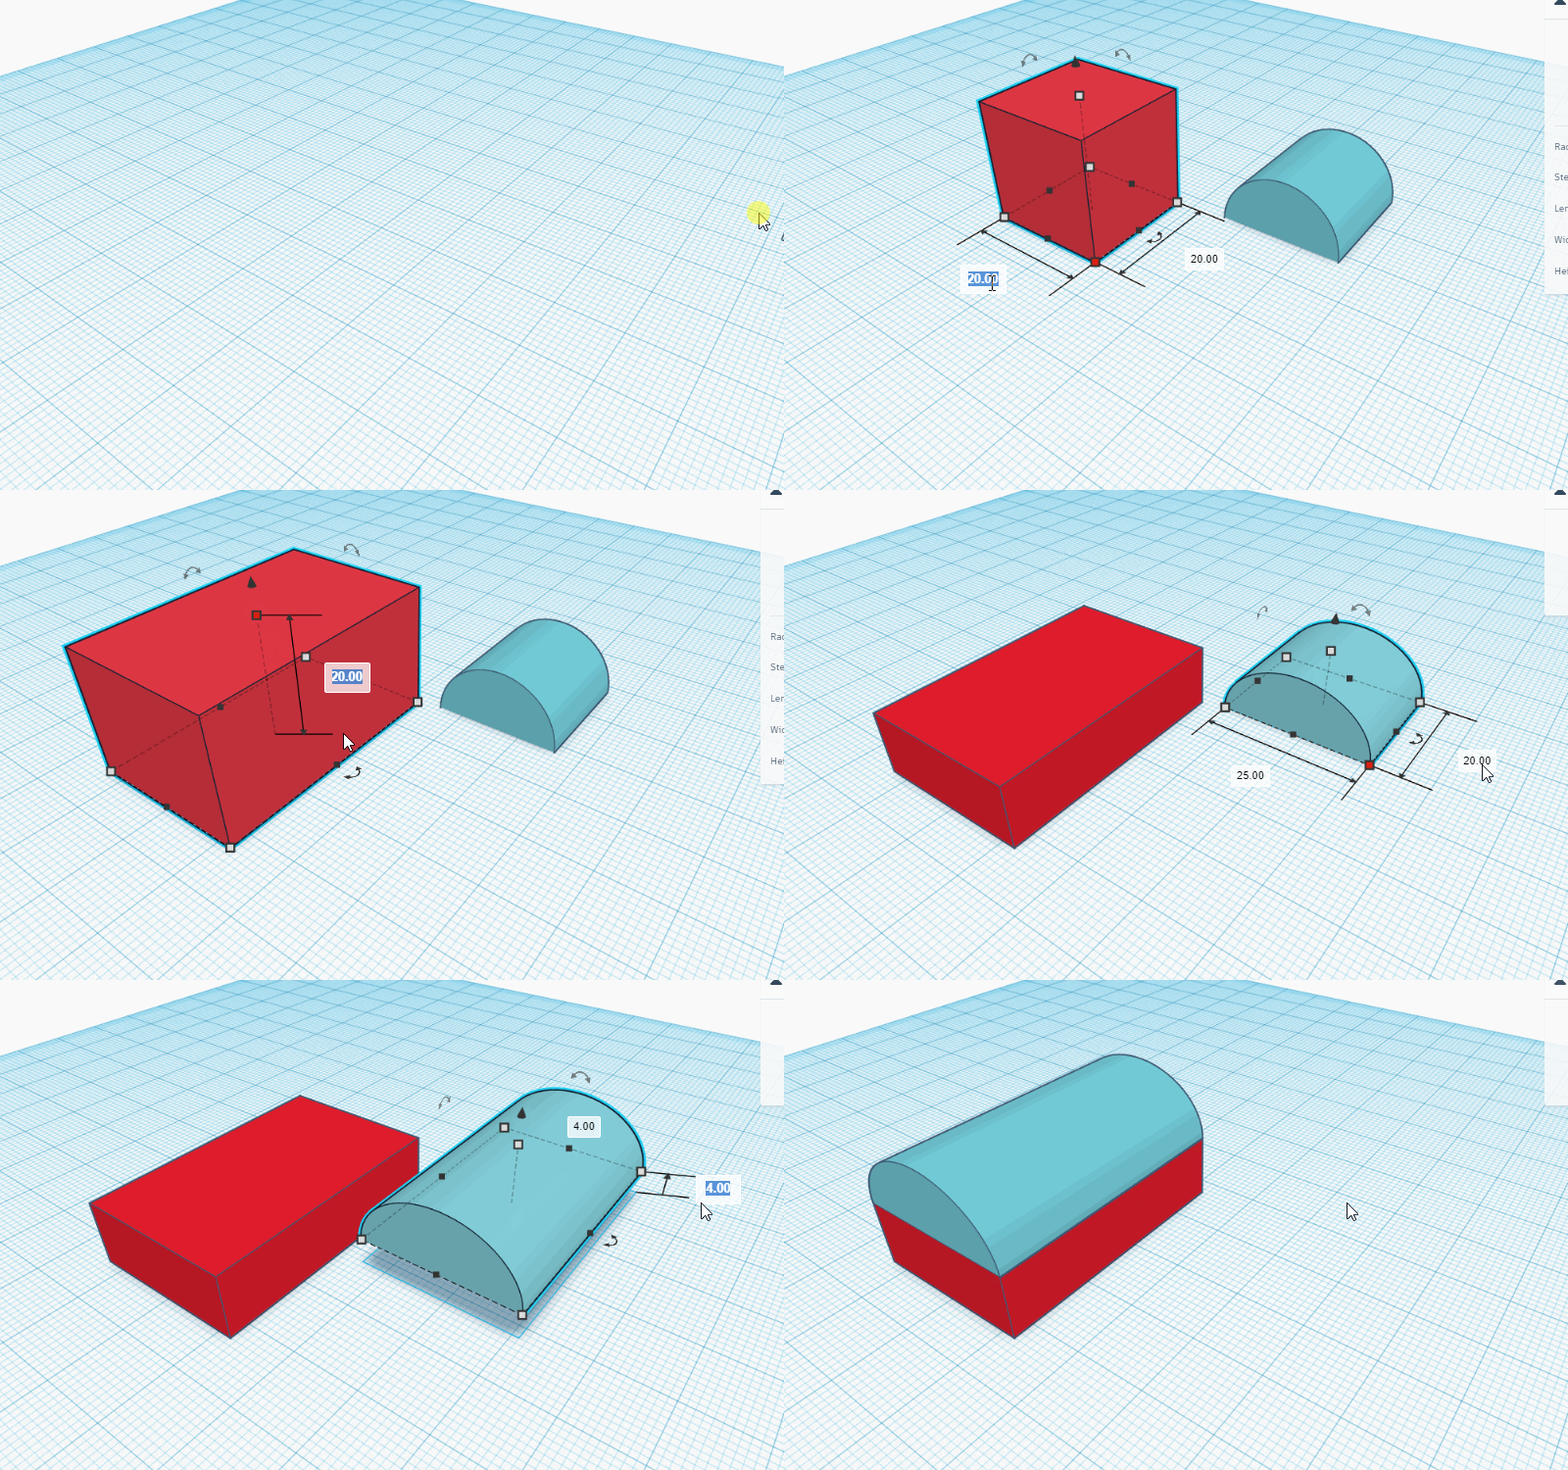
You already know how to change the dimensions and placement of individual shapes.However, to create more complex designs, you will need to combine several shapes together. For example, in the gif below a box and a rounded roof have been combined by plaing the roof on top of the box:
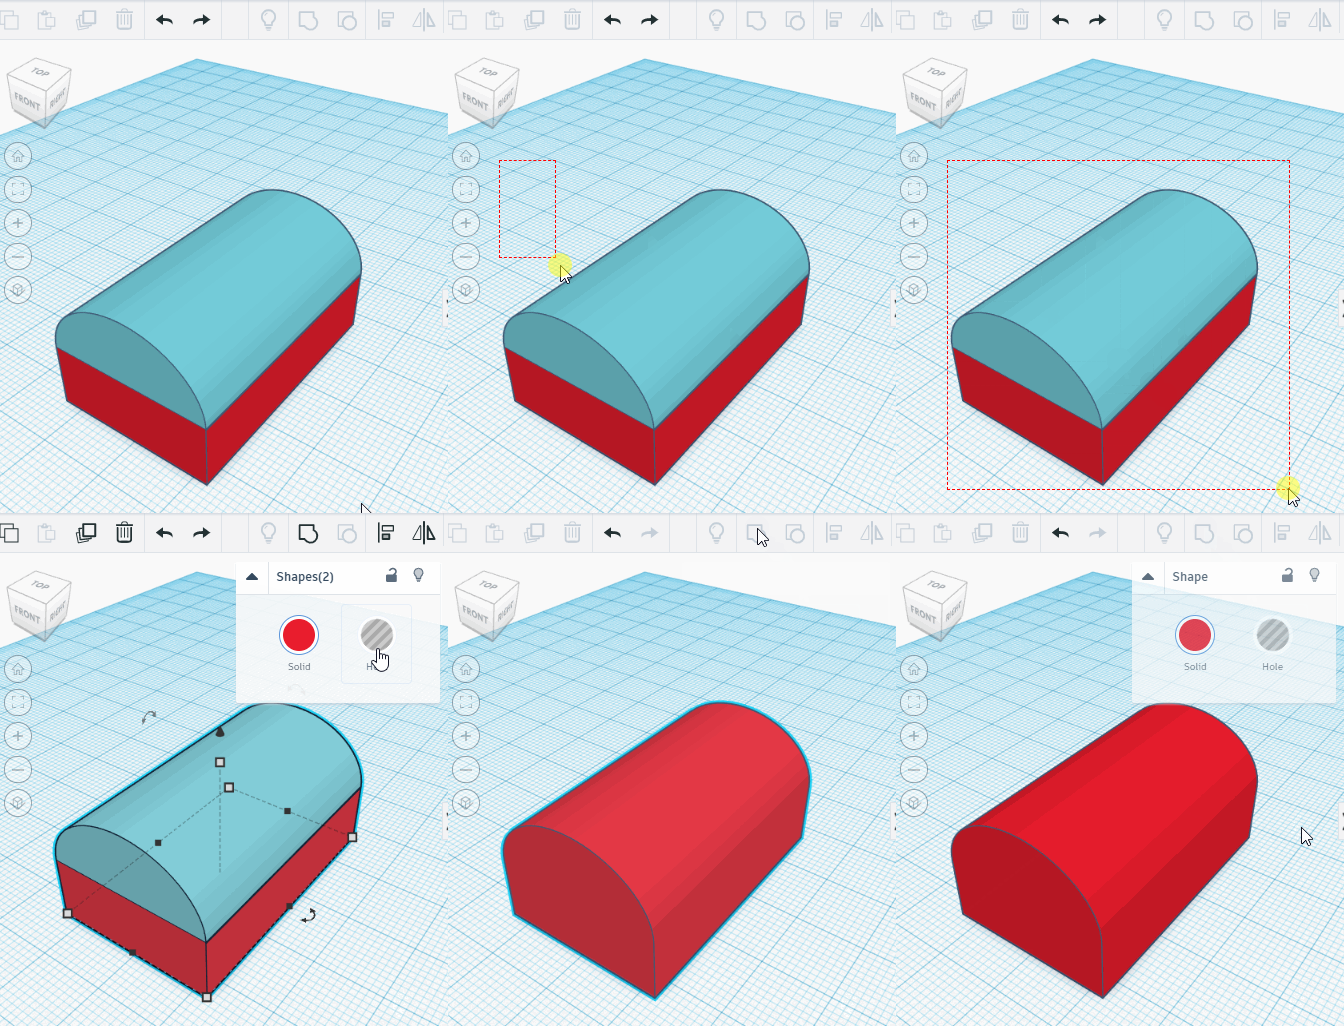
Once two or more shapes are placed in their position, they can be converted into a single shape by selecting all of them an clicking in the Group button, as shown in the gif:
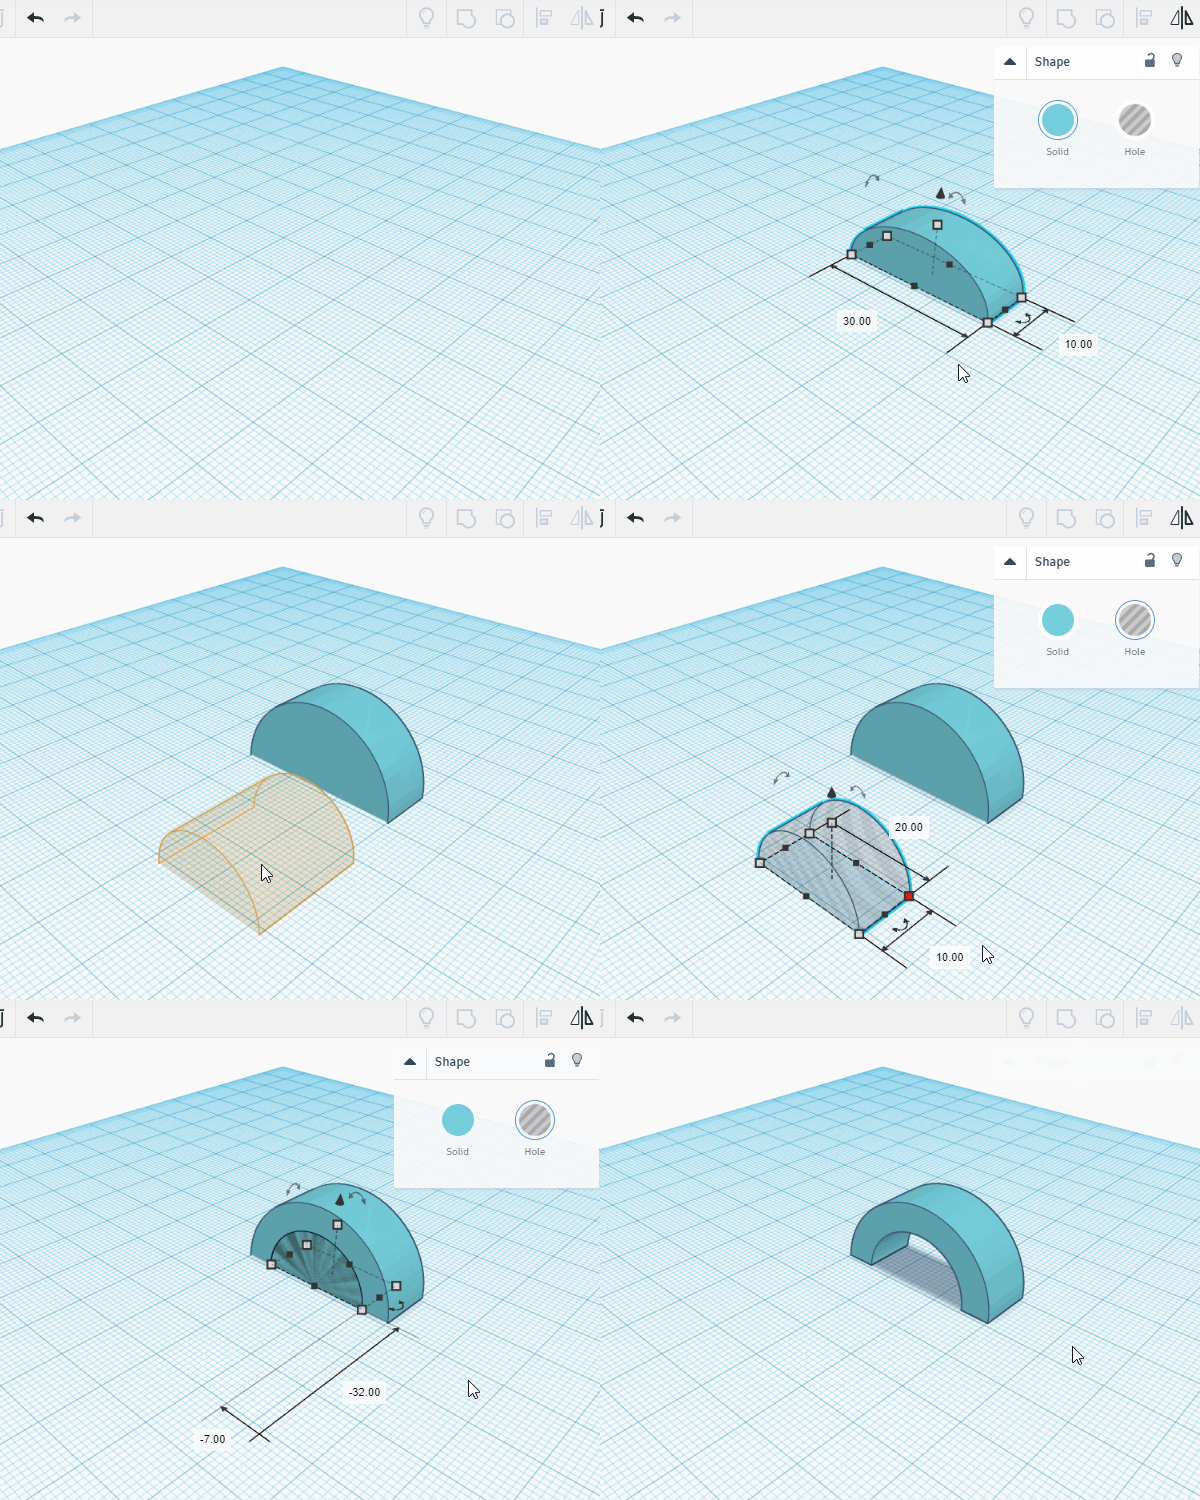
Sometimes, instead of gathering two pieces we want to remove part of a shape, that is, we want to make a hole. Any shape can be turned into a hole by clicking on the Hole button that is next to the Solid button (used to change color). For example, in the gif below, an arc has been created by removing a small rounded roof from a bigger rounded roof. As you can see, after selecting both shapes and clicking on the Group button, the small roof is removed from the big one:
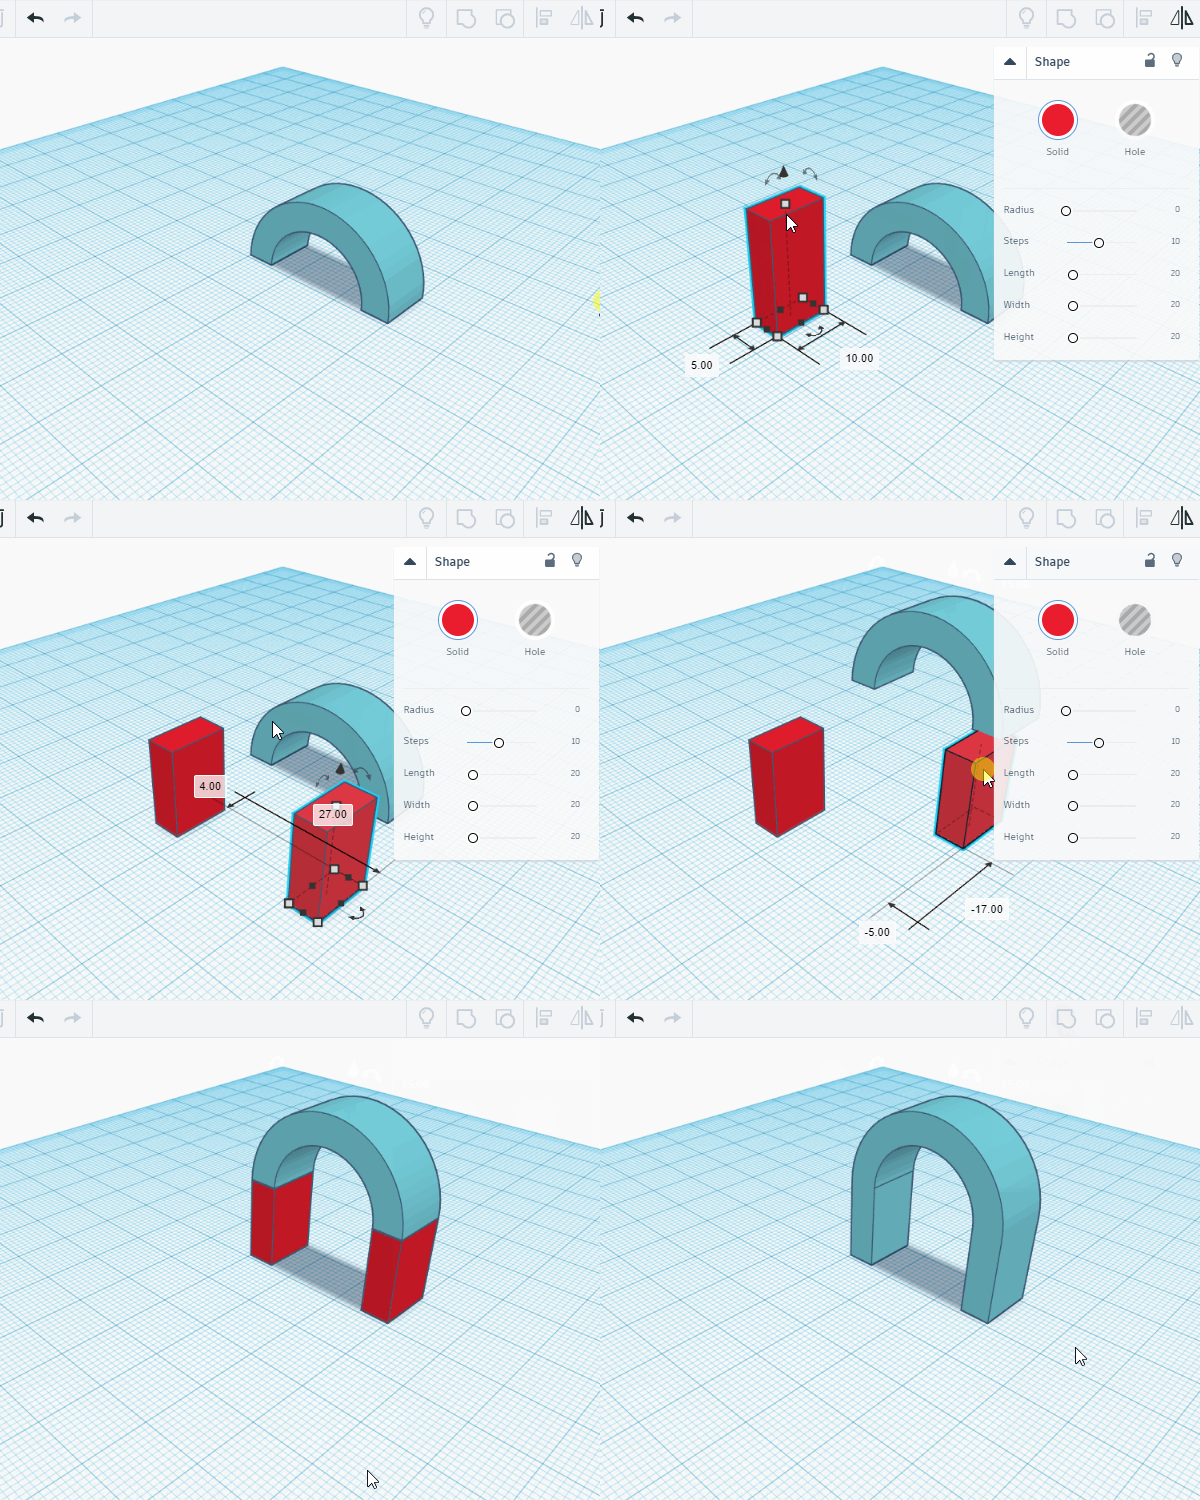
By grouping solid-shapes an hole-shapes you can create a great variety of models, as for example the one below, in which the previous arc stands on top of two columns made with boxes*.
*You can duplicate any shape by copying it (Ctrl+c) and pasting it (Ctrl+v).